Hey there! As a supplier of underground piles, I've seen firsthand how crucial a proper soil investigation is before installing those bad boys. It's like the foundation of a house - if it ain't right, the whole thing can come crashing down. So, let's dive into how you can conduct a soil investigation before installing underground piles.


Why Do a Soil Investigation?
First off, you might be wondering why we even need to do a soil investigation. Well, different types of soil have different properties. Some soils are more stable, while others can be as unpredictable as a rollercoaster. If you install piles without knowing what's going on beneath the surface, you could end up with piles that don't support the load properly, leading to structural issues down the line.
A soil investigation helps you figure out the soil's strength, density, and other important characteristics. This info is super important for determining the type, size, and depth of the piles you need. It also helps you identify any potential problems, like soft spots or high water tables, so you can come up with solutions before you start digging.
Step 1: Desk Study
The first step in any soil investigation is the desk study. This is where you gather all the existing info about the site. You can start by looking at topographic maps, geological surveys, and any previous soil reports for the area. This will give you a general idea of the soil conditions and any potential hazards.
You can also check with local authorities to see if there are any known issues with the site, like old mines or landfills. This info can save you a lot of headaches later on.
Step 2: Site Reconnaissance
Once you've done your desk study, it's time to head out to the site for a good old-fashioned look around. This is called site reconnaissance. Walk around the site and take note of any visible features, like slopes, vegetation, or signs of erosion. You can also look for any existing structures on the site and see how they're holding up.
Pay attention to the drainage patterns on the site. If there are areas where water tends to pool, this could indicate a high water table or poor soil drainage. This is important info because it can affect the stability of the piles.
Step 3: Soil Sampling
After you've done your site reconnaissance, it's time to start collecting soil samples. There are a few different methods you can use to collect soil samples, depending on the type of soil and the depth you need to sample.
One common method is the auger boring method. This involves using an auger to drill into the soil and collect samples at different depths. The auger can be either hand-operated or machine-powered, depending on the size of the project.
Another method is the test pit method. This involves digging a pit in the soil and taking samples from the sides and bottom of the pit. This method is useful for getting a better look at the soil layers and their properties.
Once you've collected your soil samples, it's important to label them properly and send them to a laboratory for testing. The laboratory will analyze the samples to determine the soil's properties, such as its moisture content, density, and shear strength.
Step 4: Laboratory Testing
The laboratory testing is where the real magic happens. The lab will perform a series of tests on the soil samples to determine their properties. Some of the common tests include:
- Moisture Content Test: This test measures the amount of water in the soil. The moisture content can affect the soil's strength and stability.
- Density Test: This test measures the density of the soil. The density can affect the bearing capacity of the soil.
- Shear Strength Test: This test measures the soil's resistance to shear forces. The shear strength is important for determining the stability of the piles.
- Consolidation Test: This test measures the soil's ability to compress under load. The consolidation can affect the settlement of the piles.
The lab will provide you with a detailed report of the test results. This report will include the soil's properties, as well as any recommendations for the type, size, and depth of the piles.
Step 5: Analysis and Design
Once you have the laboratory test results, it's time to analyze the data and design the piles. This is where you'll use the info from the soil investigation to determine the type, size, and depth of the piles.
There are a few different types of piles you can choose from, depending on the soil conditions and the load requirements. Some of the common types of piles include:
- Driven Piles: These piles are driven into the soil using a pile driver. They're typically made of steel or concrete and are used in areas with hard soil or rock.
- Bored Piles: These piles are drilled into the soil using a drill rig. They're typically made of concrete and are used in areas with soft soil or high water tables.
- Screw Piles: These piles are screwed into the soil using a screw anchor. They're typically made of steel and are used in areas with soft soil or limited access.
The size and depth of the piles will depend on the soil conditions and the load requirements. You'll need to work with a structural engineer to design the piles and ensure they meet the required safety standards.
Step 6: Installation
Once you've designed the piles, it's time to install them. The installation process will depend on the type of piles you're using.
If you're using driven piles, you'll need to use a pile driver to drive the piles into the soil. The pile driver can be either a diesel hammer or a hydraulic hammer.
If you're using bored piles, you'll need to use a drill rig to drill the holes for the piles. The drill rig can be either a rotary drill or a percussion drill.
If you're using screw piles, you'll need to use a screw anchor to screw the piles into the soil. The screw anchor can be either a manual or a hydraulic anchor.
During the installation process, it's important to monitor the piles to ensure they're being installed correctly. You'll need to check the垂直度 of the piles and make sure they're reaching the required depth.
Step 7: Quality Control
The quality control is an important part of the pile installation process. You'll need to monitor the piles during the installation process to ensure they're being installed correctly.
Some of the common quality control measures include:
- Visual Inspection: This involves visually inspecting the piles to make sure they're in good condition and there are no visible defects.
- Non-Destructive Testing: This involves using non-destructive testing methods, such as ultrasonic testing or radiography, to check the integrity of the piles.
- Load Testing: This involves applying a load to the piles to check their bearing capacity. The load testing can be either a static load test or a dynamic load test.
The quality control measures will help you ensure the piles are installed correctly and meet the required safety standards.
Conclusion
Conducting a soil investigation before installing underground piles is a crucial step in any construction project. It helps you determine the soil's properties, identify any potential problems, and design the piles to meet the required load requirements.
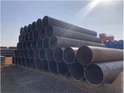
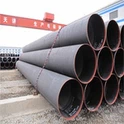
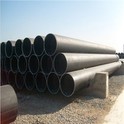
As a supplier of underground piles, we offer a wide range of high-quality piles, including EN10219 S355J0H, C350 L0 AS1163 Australia Structure Pipe, and Jacket Offshore Platform Structure Pipe. Our team of experts can help you choose the right piles for your project and provide you with the support you need throughout the installation process.
If you're interested in learning more about our products or services, or if you have any questions about soil investigation or pile installation, please don't hesitate to contact us. We'd be happy to help you with your project.
References
- ASTM International. (2021). Standard Test Methods for Moisture Content of Soils. ASTM D2216.
- ASTM International. (2021). Standard Test Methods for Density of Soil in Place by Nuclear Methods (Shallow Depth). ASTM D2922.
- ASTM International. (2021). Standard Test Methods for Direct Shear Test of Soils Under Consolidated Drained Conditions. ASTM D3080.
- ASTM International. (2021). Standard Test Methods for One-Dimensional Consolidation Properties of Soils. ASTM D2435.